1: The first tension winding Monitor installed near the product that needs to end, power: red +, black -. The back of the film supply DC24V)
2: hysteresis or magnetic clutch connection (hysteresis or magnetic clutch connecting the output port on the back surface tension stickers, regardless of the positive and negative).
3: Machine PLC analog output (0-5V) and tension Monitor connection:
Machine PLC analog output (+) corresponds to the back of the film analog inputs (+)
Machine PLC analog output (-) corresponds to the back of the film analog input (-)
0-5V corresponding analog input tension 0-5000g
4: Product setting method:
Step one:
1-- horizontally fixed the product on the shelf and the tension between the winding machine, to ensure that the shelf does not shake loose. Height as far as two points in the middle height.
2-- sure the wiring is correct, the back surface of the wiring attached to the power supply DC24V two ports can not be reversed, such as the reverse will directly lead to damage to the instrument.
Step two:
1- power, this time under the instrument panel display value to "0" (see below)
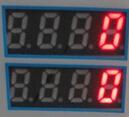
2 - If the value is not "0", but other values, this is due to the high precision sensors to detect gravitational relationship, which is a normal phenomenon.
3-- hold down the "T" zeroing key 3 seconds, then a flash of white light above says cleared completed.
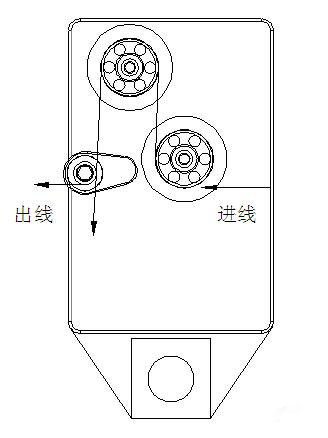
Step Three: Follow the schematic complete threading, from tension to tension Monitor device and then winding machine. Attention must be cleared before threading, otherwise there will be tension sensor additive effect).
Step four: Tension setting (for setting the tension on the screen, the next screen is real tension):
Machine PLC analog output (0-5V) and tension Monitor connection:
Machine PLC analog output (+) corresponds to the back of the film analog inputs (+)
Machine PLC analog output (-) corresponds to the back of the film analog input (-)
0-5V corresponding analog input tension 0-5000g (corresponding analog input 0.5V working tension of 500g
1- Press "SET" key and the display screen will automatically move to the next menu, as shown
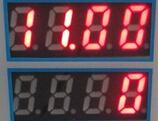
This menu function is fine-tuning feature, which is the brand hysteresis and magnetic brake performance difference of a regulation, this product factory setting value of "10" if you do not need to meet the requirements of regulation.
2- Press SET Kin enter the initial interface, long press SET Kin 5 seconds, long bright white light entering the hysteresis settings, as shown, "2000" is the factory default hysteresis is 2KG, To change the hysteresis control torque size can modify.
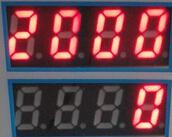
3- press the SET button to enter the long bright red Options "2", as shown in Figure "50" as the factory default, is set to enter closed loop tension down 50g starting point, you can adjust itself depending on the diameter of the entering Closed-loop range, adjustable value 0-999g.

Step Five: fine-tuning the program
Press "SET" to enter the red light, when the winding machine work by adjusting the menu "a" tension fine tuning "1.00" (trim value "0-9.99) the greater the value the greater the tension will be less tension and vice versa) through tension fine-tuning to precisely lock tension value you set, the value will be saved automatically after set up, see below). "
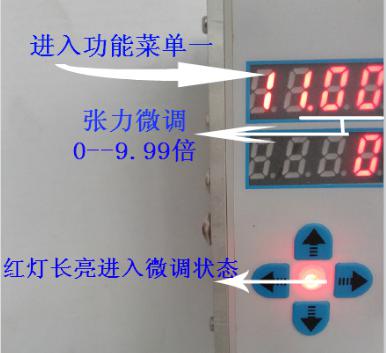
After completion of the above fine-tune settings set by SET Kin exit mode, where all the settings is complete.
Note:
Do not use force to press the tension pulley in the three monitor precision guide wheel in the middle, because the connection is behind the sophisticated sensors, if the external force is greater than the range of the sensor will cause tension display does not work or show damage tension failure.
Threading - Schematic
